7 Tips for Choosing the Best Inflatable Tent
Choosing an inflatable tent can feel simple until you compare pump systems, fabric ratings, packed size, and sleeping capacity. A roomy floor plan may look ideal online, yet leave little space for muddy boots or wet jackets. Small details matter.
This guide introduces seven practical checks for choosing a tent that suits your trips, budget, and weather expectations. You’ll learn how to assess air-beam construction, setup time, ventilation, water resistance, and repair options. Consider the weight you’ll carry from the car park. Not every feature deserves equal priority. A family at a fixed campsite may value headroom and multiple entrances, while a touring couple may prefer a compact bag and quick pitching. Consider where you’ll camp, how often you’ll move, and who will help with setup. Compare manufacturer specifications with clear product instructions and independent reviews, rather than relying on dramatic marketing claims. Check what’s included, too: pumps, guylines, and repair patches can vary by model. The search phrase “Aufblasbare Zelt” may appear in product listings, but the wording alone says nothing about quality. Look for credible measurements and support details. One caution: advertised setup times usually assume practice and favorable conditions. Test the tent at home. It may take longer than expected. Practice first. These tips won’t identify one perfect shelter, because there isn’t one. They can help you choose a dependable option with fewer surprises—and notice where your own assumptions may be wrong.
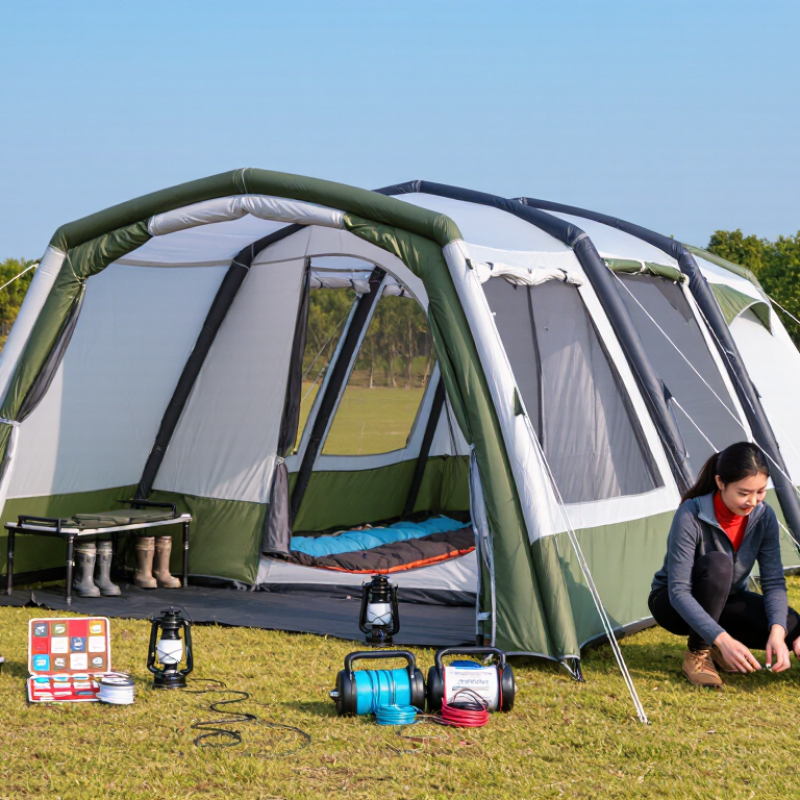
Define Capacity Using Rated Occupancy and Published Floor Dimensions
An inflatable tent’s rated occupancy is a starting point, not a promise of comfort. Check the published floor dimensions and compare them with your sleeping mats, bags, and planned layout. A tent rated for four may fit four people closely, but leave little room for wet boots or changing clothes. Numbers can mislead. Also note whether the listed dimensions describe the full floor or only its widest points; curved walls can reduce usable space near the edges.
Tips: Sketch your layout before buying. Allow room for each mat and a narrow path to the door. Check whether the stated occupancy assumes compact sleeping arrangements, and read the maker’s setup notes. If possible, compare your measurements with a real floor plan or inspect a similar tent in person. Small differences matter.
Think about how you will use the space overnight, not just how many people can lie down. A family with bulky bedding may need more floor area than the rating suggests. Measure your gear at home, then add a little clearance for movement. I once underestimated how much space a bag takes beside a mat. It was an easy mistake. Use the published figures, but treat them as a baseline and choose extra capacity when comfort matters.
7 Tips for Choosing the Best Inflatable Tent - Define Capacity Using Rated Occupancy and Published Floor Dimensions
Use the tent’s stated occupancy and published sleeping-area dimensions together. The configurations below are illustrative calculations, not specifications for particular tents. Floor area is calculated as length × width; square feet per person is floor area ÷ rated occupancy.
| Tip | What to check | Illustrative published floor dimensions | Rated occupancy | Floor area | Area per rated person | How to use the comparison |
| 1 | Start with the stated capacity | 8 × 10 ft | 4 people | 80 sq ft | 20 sq ft/person | Treat the manufacturer’s rated occupancy as a maximum reference, not a guarantee of roomy sleeping space. |
| 2 | Calculate floor area from the listed dimensions | 10 × 12 ft | 6 people | 120 sq ft | 20 sq ft/person | Multiply published length by width. Confirm whether dimensions describe the sleeping area or include another section. |
| 3 | Compare space per person, not just total capacity | 10 × 14 ft | 8 people | 140 sq ft | 17.5 sq ft/person | A higher rated capacity can mean less floor area per person. Compare this figure across tents of similar size. |
| 4 | Allow for personal gear and sleeping layouts | 12 × 16 ft | 10 people | 192 sq ft | 19.2 sq ft/person | Consider sleeping pads, bags, and the space needed to move around; floor area alone does not account for these needs. |
| 5 | Check whether an annex or vestibule is counted | 13 × 20 ft | 12 people | 260 sq ft | 21.7 sq ft/person | Use sleeping-area dimensions for sleeping capacity. Do not count storage or covered entry space unless it is listed as usable floor area. |
| 6 | Verify which dimensions are published | Compare stated floor length and width | Use the listed rating | Recalculate if needed | Use the same units | Check the product specification for floor dimensions; peak height or overall packed dimensions are not substitutes for floor size. |
| 7 | Choose capacity for your actual group | Compare sleeping-area measurements with your planned layout | Do not exceed the stated rating | Account for usable floor space | More space per person generally allows more room | For extra comfort or bulky gear, consider a larger sleeping area rather than relying on the maximum occupancy figure alone. |
Note: The example dimensions and occupancy figures above are hypothetical inputs for demonstrating the arithmetic, not verified specifications of real products. Always confirm a tent’s current rated occupancy and published floor dimensions with its product documentation.
Compare 1,500 mm Flysheet and 3,000 mm Floor Ratings via ISO 811
A 1,500 mm flysheet rating and a 3,000 mm floor rating describe resistance to water pressure, not guaranteed performance in every storm. Under ISO 811:2018, fabric is tested by applying increasing hydrostatic pressure until water penetrates. The ratings correspond roughly to 14.7 kPa and 29.4 kPa. The floor’s higher figure makes sense: pooled water, muddy ground, and pressure from knees or gear can challenge it more than a flysheet. But a number is not a dry-tent guarantee.
Tips: Compare like with like. Check whether the stated rating applies to the fabric alone or includes seams and coatings. Look for the test method and whether the sample was new or aged. A flysheet rated at 1,500 mm may suit moderate conditions, but wind-driven rain and worn seams can still cause leaks. For the floor, 3,000 mm offers more pressure resistance; use a groundsheet only if it does not trap water underneath.
Read the test details, not just the headline figure. ISO 811 gives a repeatable hydrostatic-pressure method, but it does not recreate every campsite, gust, or setup mistake. Seams, abrasion, and fabric tension matter. I’d treat the rating as a useful comparison, not a promise. A small detail, but an important one.
Check Camping-Tent Safety Against EN ISO 5912:2020
7 Tips for Choosing the Best Inflatable Tent
Check Camping-Tent Safety Against EN ISO 5912:2020
EN ISO 5912:2020 sets requirements and test methods for recreational camping tents. When comparing inflatable tents, check that the supplier’s test documentation names this exact standard and edition. The Outdoor Industry Association’s 2024 Outdoor Participation Trends Report counted 175.8 million U.S. outdoor participants in 2023. That represented 57.3% of people aged six and older. This is participation data, not tent-injury evidence, but it shows how many people spend time outdoors. Safety details deserve a close look.
Tip: Ask for the laboratory report, not just a printed claim. Match the report to the tent model and configuration you plan to buy. Inspect seams, valves, guy-line points, and the floor for clear construction details. Check whether setup instructions explain anchoring and ventilation. Paperwork helps, but it cannot judge a badly pitched campsite. A compliant tent can still be set up poorly.
On a firm, level patch, inflate the tent and check whether its frame holds shape. Look for loose stitching or air loss before your trip. Then read the care instructions; worn fabric or neglected valves may affect performance. Standards are useful, not magic. I would still want clear evidence of testing, and I would not treat a label alone as proof that every setup is safe.
Match Air-Beam Inflation Pressure to the Manufacturer’s PSI Rating
Match each air beam to the pressure printed in the tent’s manual or on its label. Do not treat a pump’s maximum pressure as the target. Use a gauge, inflate in short bursts, and check the reading at the valve. A beam that feels firm by hand may still be below its specified PSI. Too much pressure can strain seams and fabric; too little can leave the tent slack in wind. Small differences matter.
Temperature changes can shift pressure, even when no air is added. NIST’s REFPROP database provides reference properties for air, while the ideal-gas relationship explains the practical effect: in a sealed, fixed-volume beam, warming air raises pressure. For example, a 5°C rise from 20°C can increase absolute pressure by roughly 1.7%. That is an estimate, not a substitute for the tent maker’s instructions. Check again after the tent has warmed in direct sun. Easy to miss.
ISO 5912:2020 covers requirements and test methods for camping tents, but it does not set one universal PSI for every air-beam design. Follow the specific rating for your tent and use a compatible gauge. If the reading seems inconsistent, stop and inspect the valve, hose, and gauge connection before adding more air. I’ve seen hand checks feel reassuring, yet they are imprecise; a gauge is less convenient, but more dependable.
Compare Fabric, Seams, UV Data, and Repair Options Before Buying
Fabric choice affects weight, durability, and comfort. Ask for the fabric’s composition, thickness, and coating details, not just a “heavy-duty” label. A denser fabric may resist abrasion, but it can also add weight and take longer to dry. Compare these details with how you will carry and use the tent. Check the corners. These areas often face repeated tension, especially when the tent is packed tightly.
Seams deserve a close look. Inspect photos or samples for even stitching, sealed joins, and reinforcement around anchor points. A neat seam is reassuring, but ask how it is sealed and whether that treatment can wear down. UV data matters too. Look for test results tied to the actual tent fabric, including the testing method and conditions. A vague claim such as “UV resistant” offers little basis for comparison. Dark fabric alone does not prove stronger protection.
Finally, check the repair options before buying. Ask whether small punctures can be patched, whether repair material is included, and how replacement valves or fabric panels are handled. A compact patch kit is useful when you notice a pinhole beside a campsite table, not days later. Keep it simple. I can be tempted by impressive specifications, yet the details are only useful if they match real maintenance needs. Read the care instructions, too; some coatings need gentler cleaning than expected.
UV Protection: What UPF Ratings Mean
UPF describes how much UV radiation a fabric blocks: UPF 15 blocks about 93.3%, UPF 30 about 96.7%, and UPF 50+ at least 98%. When comparing inflatable tents, check the tested UPF rating for the fabric and ask whether it applies to the finished tent material.